

Integrating Jenkins with Jfrog


Login to the Jfrog
create a new user by navigating to the User Management section --> Click on the Users and click on Add new user, provide the following details
Username: add a new username
Email Address: use the same email address that you generally use to receive notifications
Roles: Select Administer Platform
Password: add password
Retype password: retype the password here
now, Click on the save
Login to the Jenkins
Install the Artifactory plugin, Go to the Manage Jenkins --> Plugins --> Artifactory Plugin and install the plugin with restart Jenkins selected

Now, Navigate back to the Manage Jenkins --> System --> scroll through the page and search for JFrog Section, Click on the Add JFrog Platform Instance
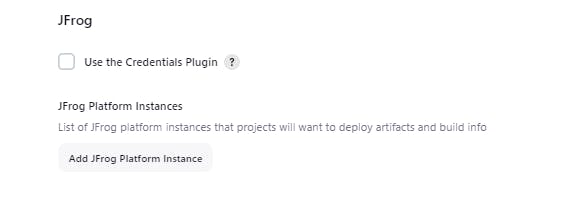
In the JFrog Section, Provide the following details as shown below
Instance ID: JFrog-Instance-ID1
JFrog Platform URL: provide the base URL of the JFrog here serverip:8082 just add the artifactory at the end as shown below:
In the Default Deployer Credentials section
Username: provide the JFrog newly created username
Password: provide the password for the newly created user
In the Advanced Configuration
JFrog Artifactory URL: serverip:8082/artifactory
JFrog Distribution URL: serverip:8082/distribution
Connection Timeout: 300
After providing these details :
Click on the Test connection which is beside the Default Deployer Credentials section. Observe that it gets connected to the JFrog.
Hurray!!!!! :)
Test the JFrog and Jenkins Connectinvinty
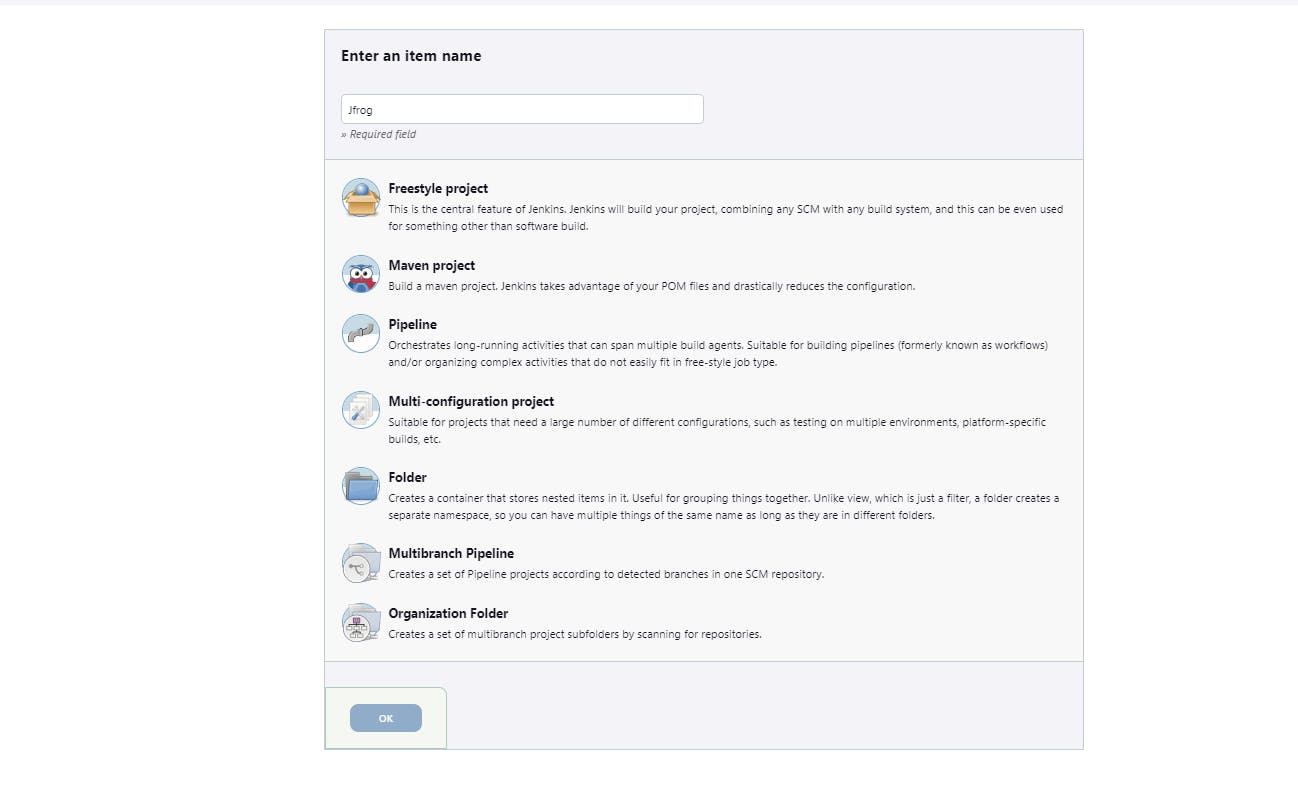
Create a new job in the jenkins by clicking on the New Item
Enter the item name as Jfrog, select Freestyle Project and click ok
In the new job
In the Description: Integration between Jfrog with Jenkins
In the Source Code Management Section:
Select Git

Provide the details of your git repo or you can use mine https://github.com/krisforu/sparkjava-war-example
there will be no credentials as it's a public repo.
Now, Scroll down a bit search for Maven3-Artifactory-Integration and select it
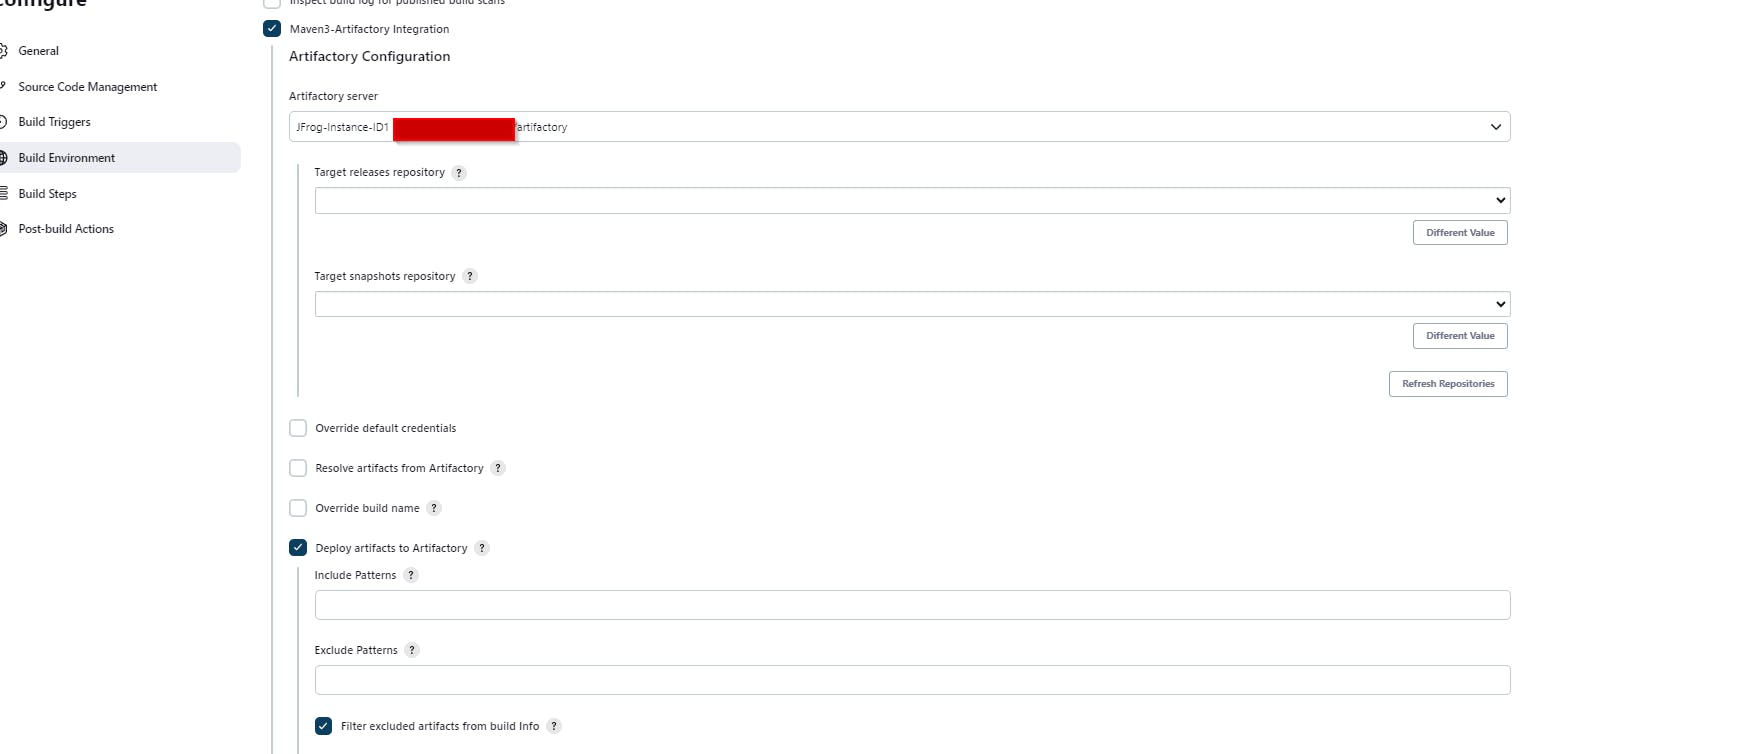
Click on the Refresh Repositories button first,
Now in the dropdown of the target releases repository, select libs-release-local
Now in the dropdown of the target releases repository, select libs-snapshot-local
Let's move to the next section in the Job
Build Steps Section: Click Add Build Step, in that dropdown select Invoke artifactory Maven3
Root POM: pom.xml
Goals and options: clean install package
However, if it shows an error as shown below

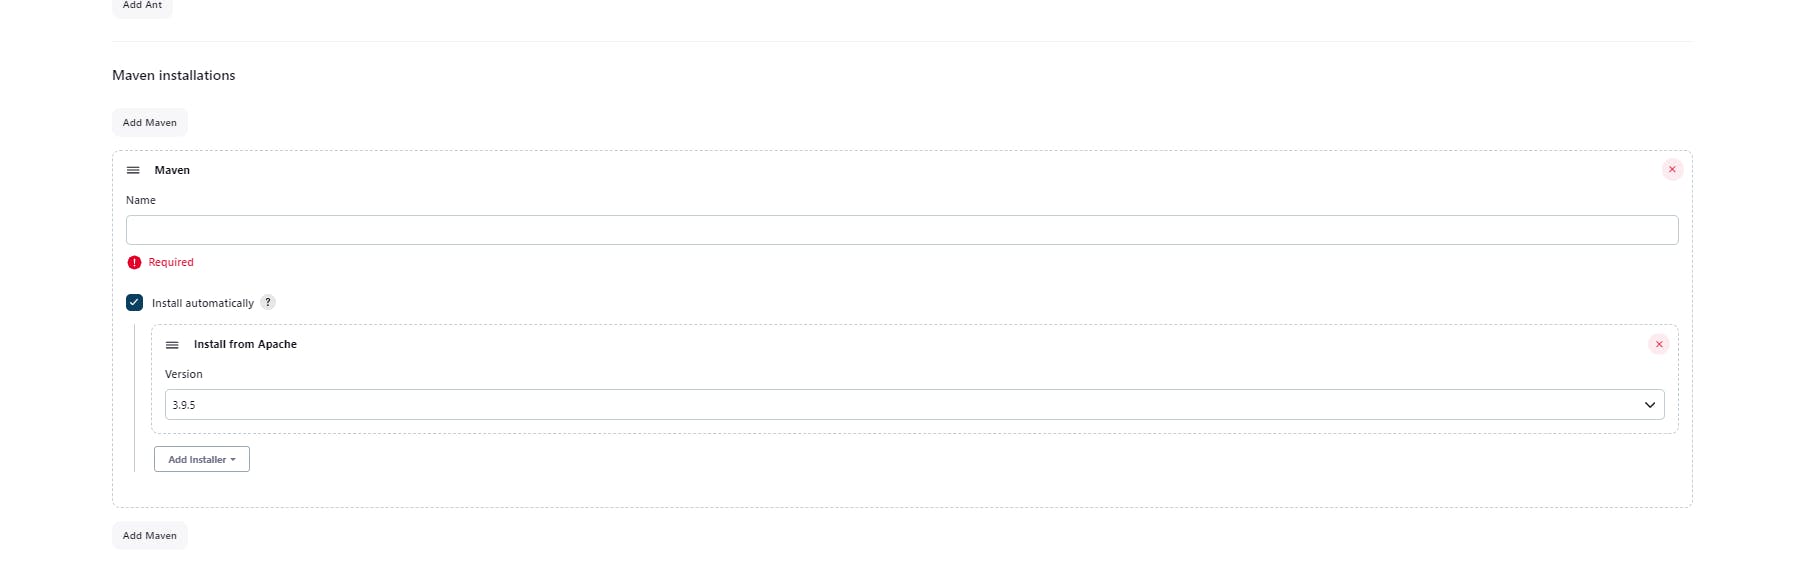
let's set the Maven quickly
Access Jenkins Configuration:
a. Log in to your Jenkins instance as an administrator.
b. Click on "Manage Jenkins" in the left-hand navigation.
c. Click on "Global Tool Configuration."
Configure Maven:
a. Scroll down to the "Maven" section in the Global Tool Configuration.
b. Click on the "Add Maven" button to add a Maven installation.
c. Provide a name for the Maven installation, e.g., "Maven 3.9.5" or any name you prefer.
d. In the "MAVEN_HOME" field, specify the path to your Maven installation. For example, if you've installed Maven in
/opt/apache-maven-3.9.5, you would enter that path.e. Click the "Save" button to save your configuration.
Lastly, provide the permissions for Jenkins user as shown below for the jfrog workspace
chown -R jenkins:jenkins /var/lib/jenkins/workspace/Jfrog